# 开发Web程序
# 1. C/S 架构
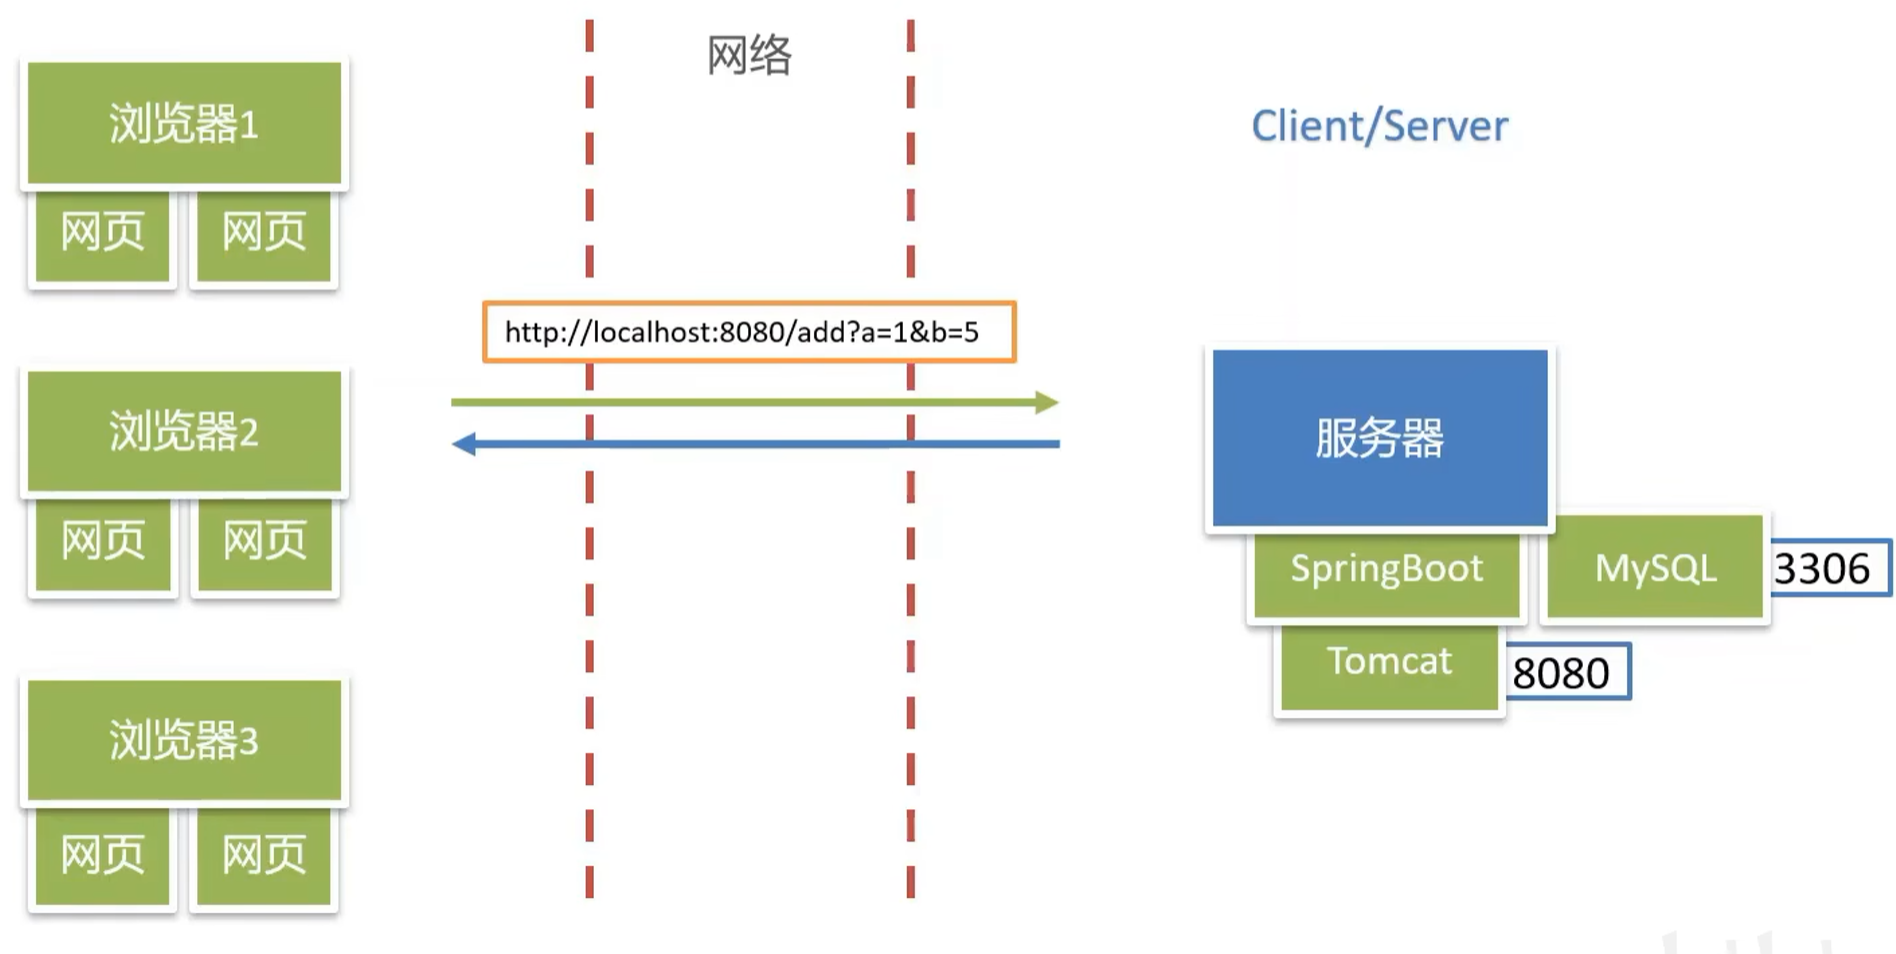
也可以认为是 B/S 架构,因为 C 端为 Browser
# 2. SpringBoot简介
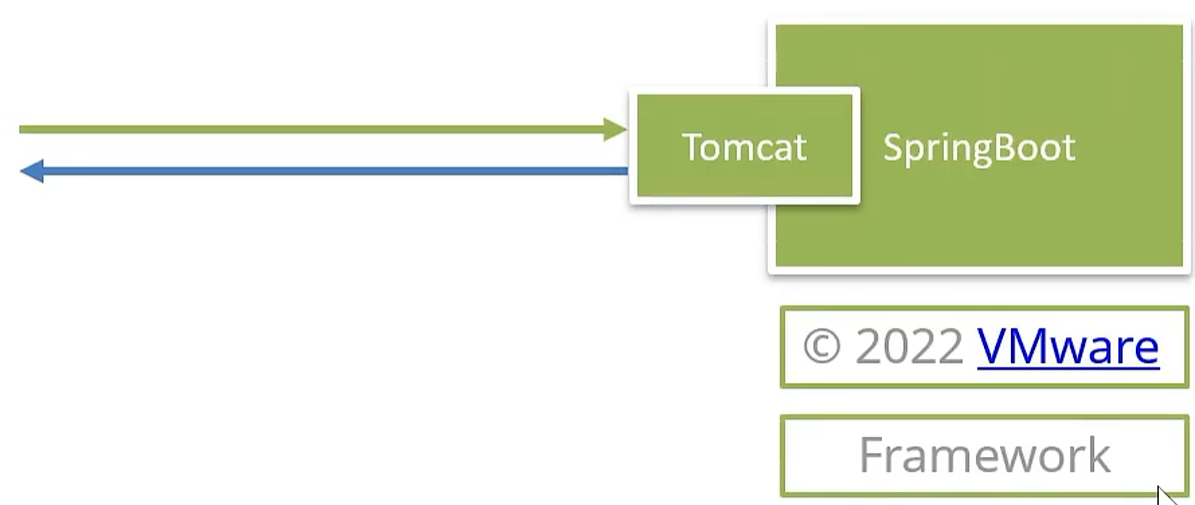
framework(框架):
- 条条框框,必须按照框架的规则来编写代码
- 通用功能,框架提供了很多通用的功能,能够节省开发时间,提升开发效率
参考:
# 3. 生成骨架代码
1.通过网页生成;2.通过 idea 引导生成
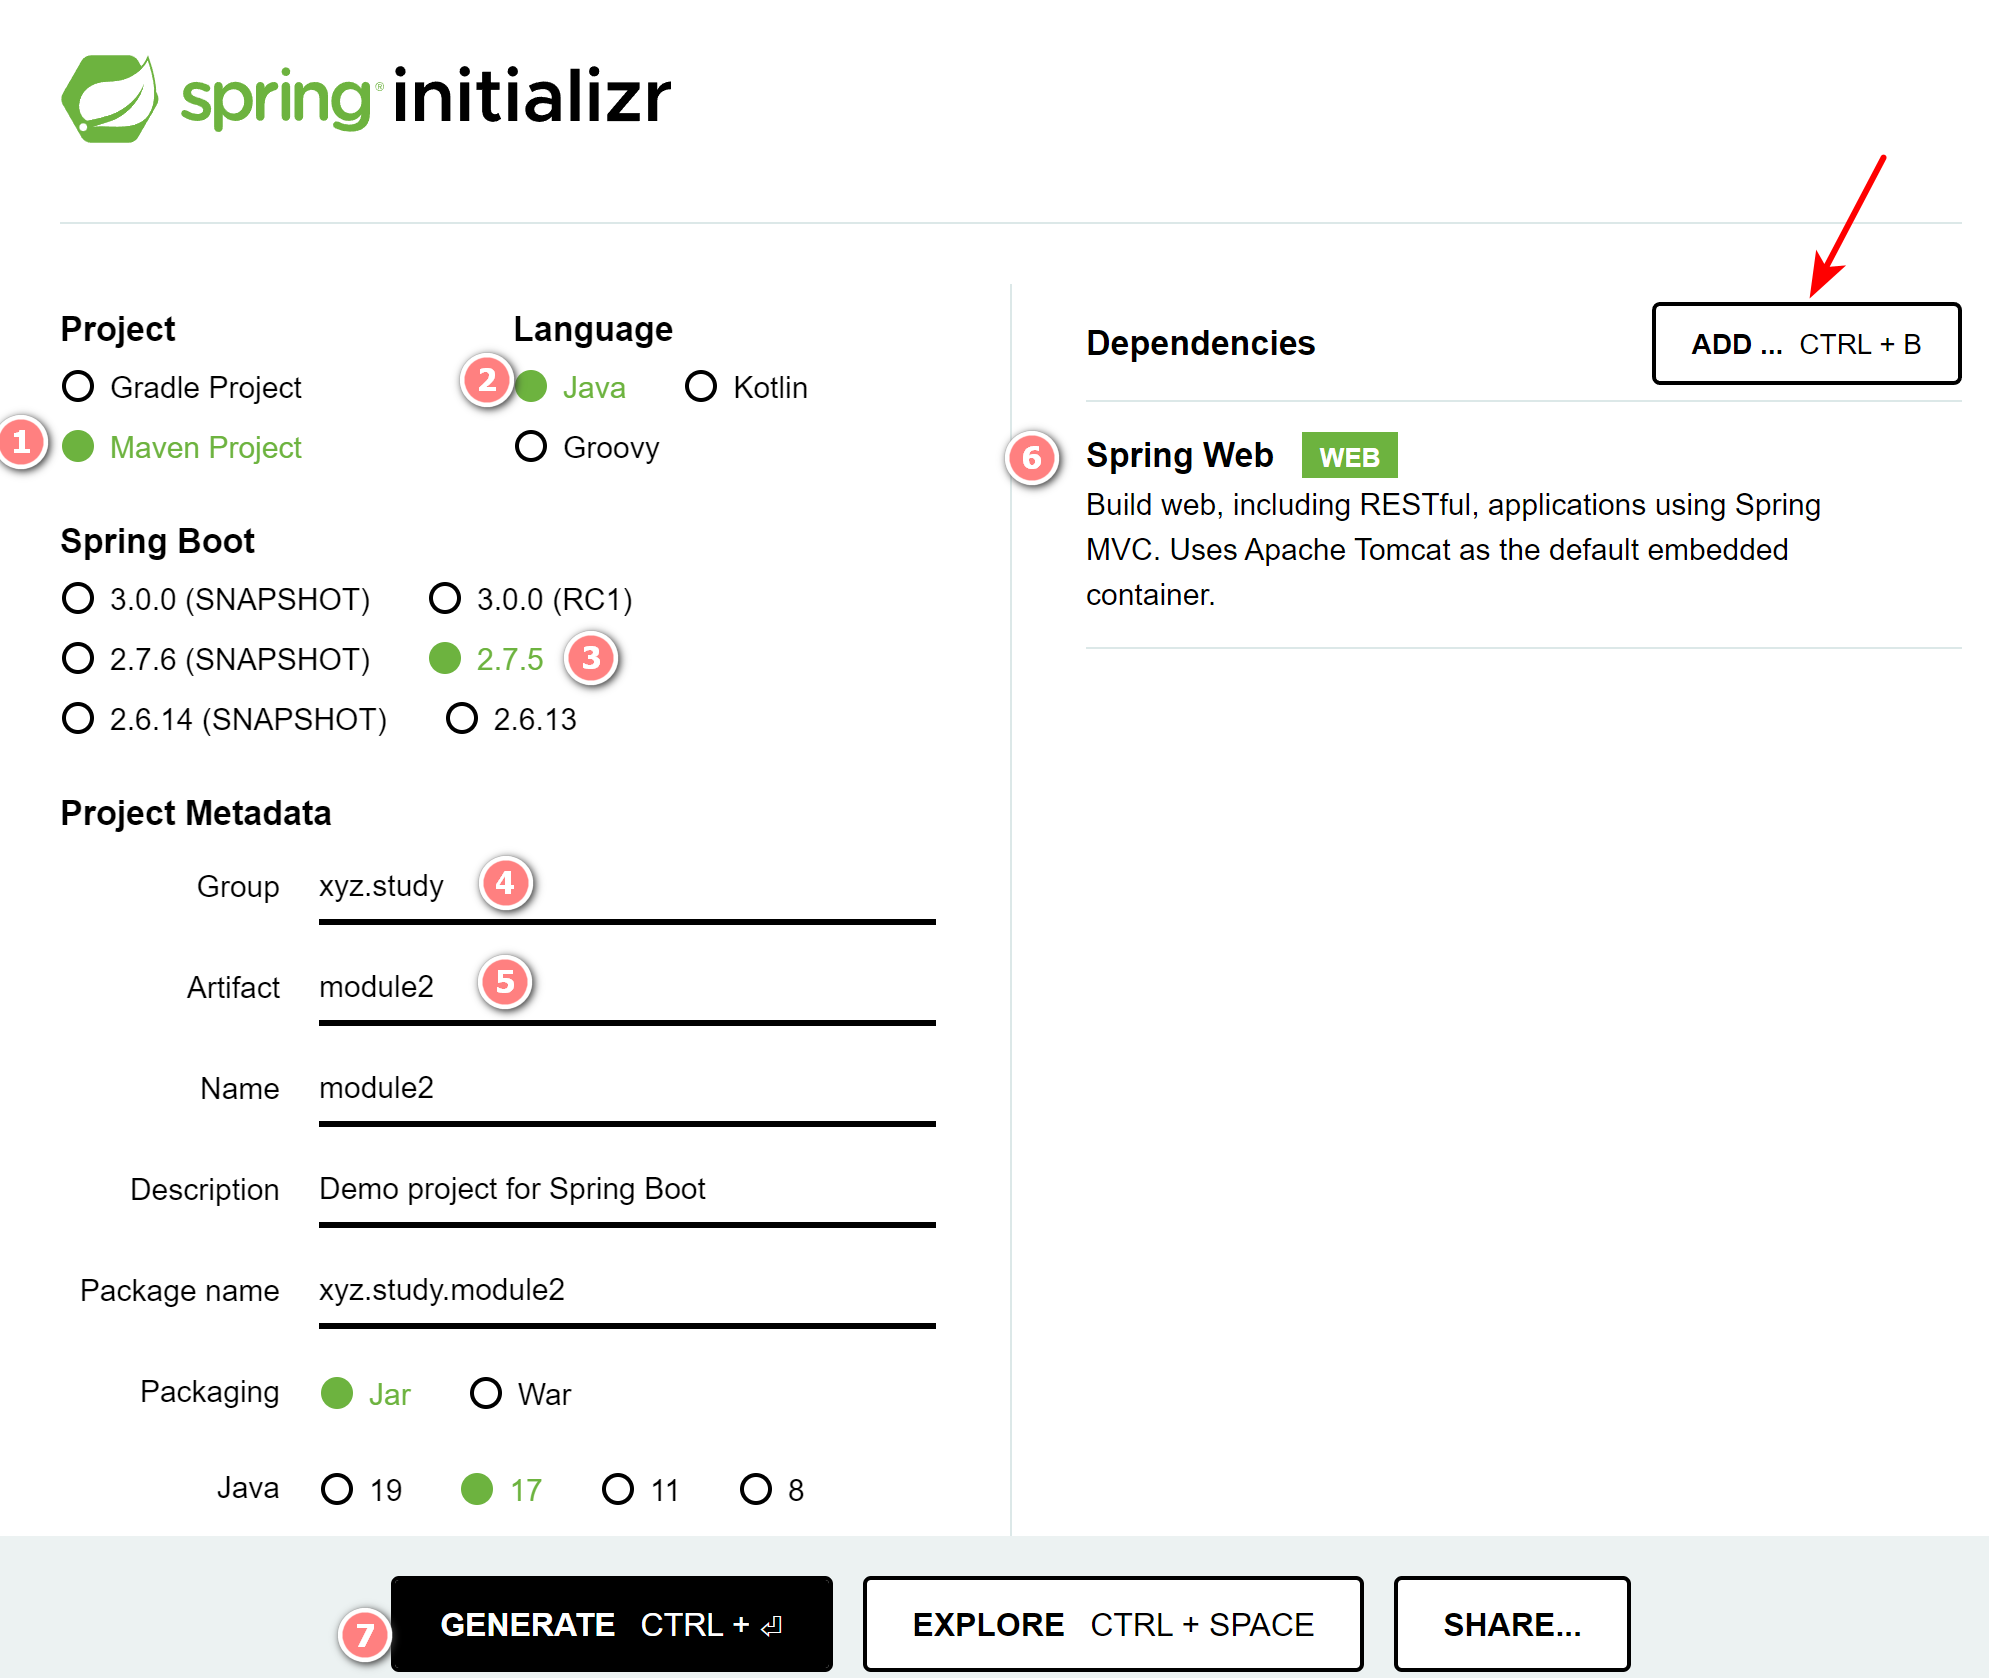
# 3.1. spring initializr
官网:
示例:
# 3.2. Aliyun Java Initializr
地址:
示例:

修改:(spring 版本、java 版本)
pom.xml:

  1.8 --> 17
    三处修改

  2.3.7.RELEASE --> 2.7.5
    两处修改
# 3.3. 导入
# 3.3.1. 将 module2.zip 解压,并拷贝到项目

# 3.3.2. 修改 idea 内置 maven 配置:
<!--
  IntelliJ IDEA 2022.2.3\plugins\maven\lib\maven3\conf\settings.xml
-->

<mirror>
  <id>central</id>
  <mirrorOf>central</mirrorOf>
  <url>https://maven.aliyun.com/repository/public</url>
</mirror>
# 3.3.3. 导入项目
方式一:(导入模块)
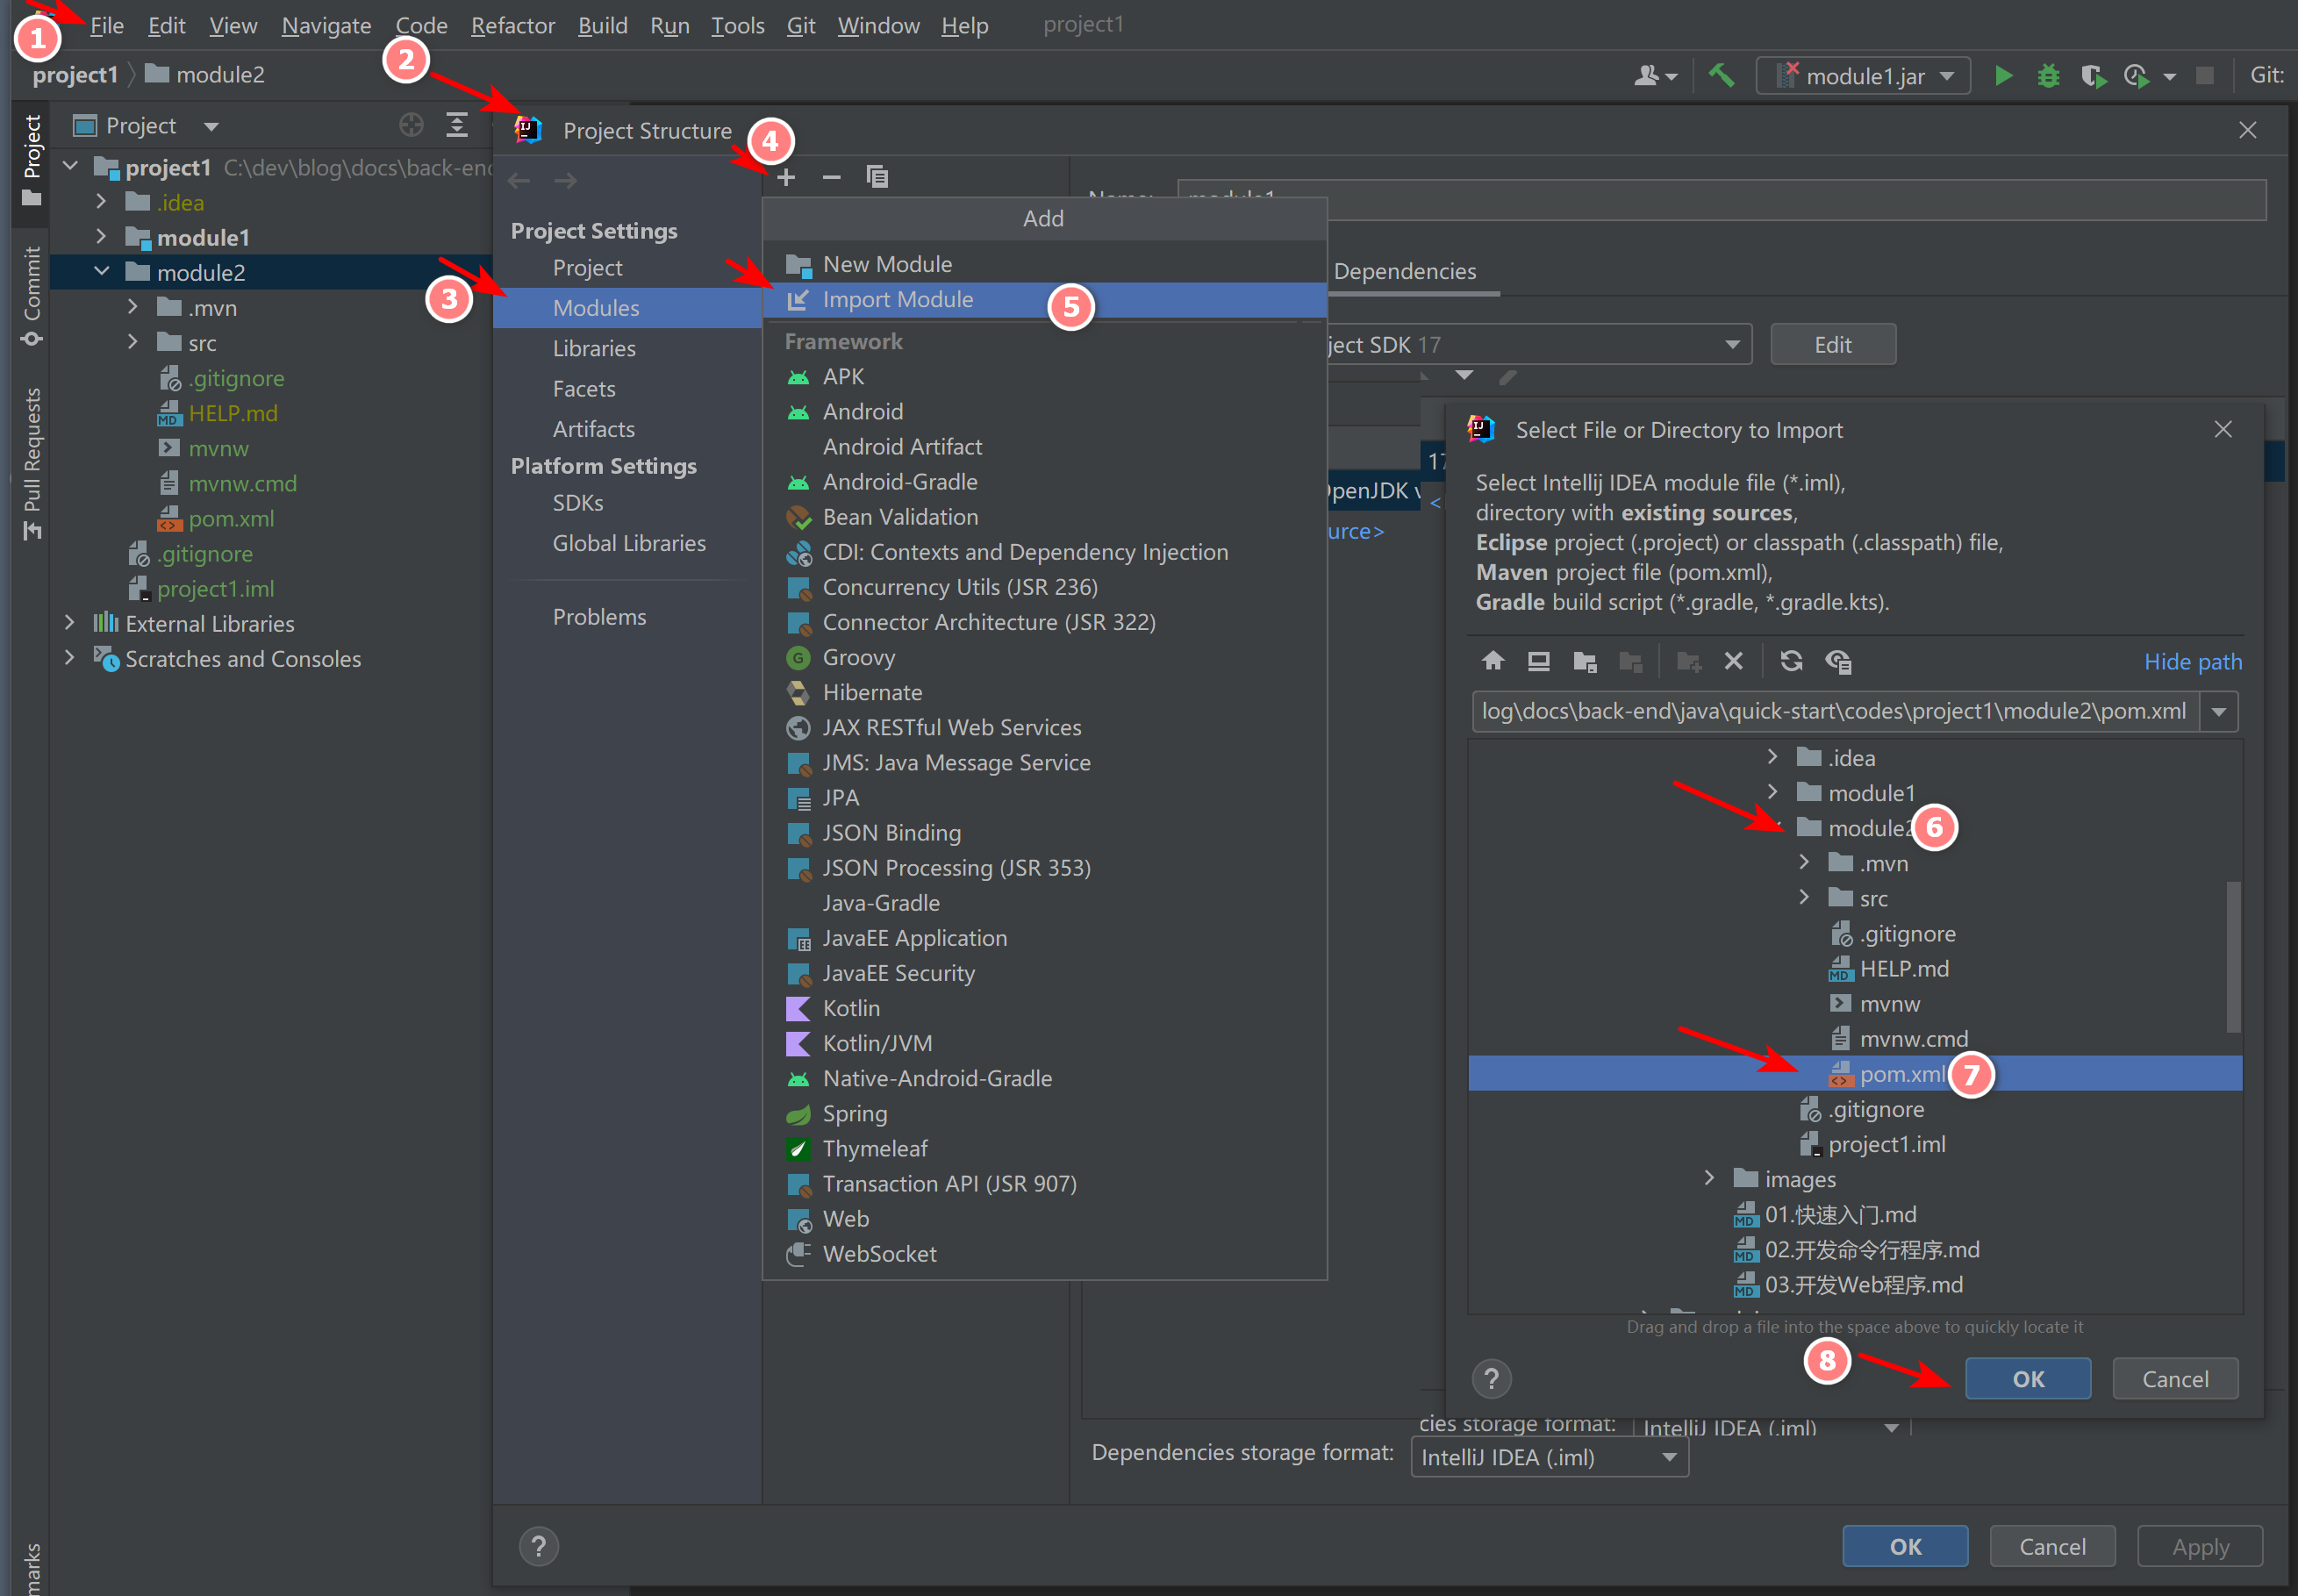
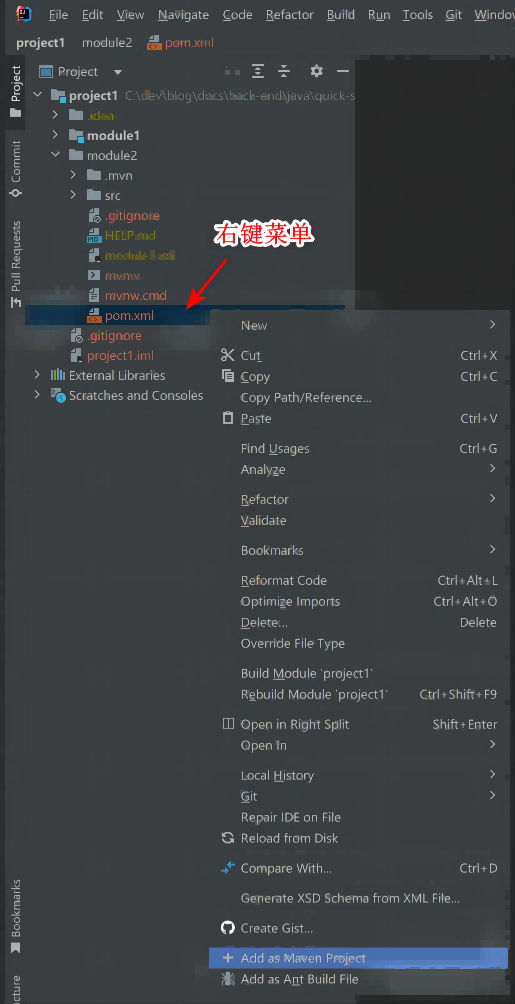
方式二:(作为maven项目添加进来)
参考:
# 4. springboot 入门
示例:
// /docs/back-end/java/quick-start/codes/project1/module2/src/main/java/xyz/study/module2/HelloController.java
package xyz.study.module2;

import org.springframework.stereotype.Controller;
import org.springframework.web.bind.annotation.RequestMapping;
import org.springframework.web.bind.annotation.ResponseBody;

@Controller
public class HelloController {
    @RequestMapping("/sayHello")
    @ResponseBody
    String sayHello() {
        return "Hello, spring boot";
    }

    @RequestMapping("/sayBye")
    @ResponseBody
    String sayBye() {
        return "Bye, spring boot";
    }
}
运行:
执行 Module2Application.java 类即可


  .   ____          _            __ _ _
 /\\ / ___'_ __ _ _(_)_ __  __ _ \ \ \ \
( ( )\___ | '_ | '_| | '_ \/ _` | \ \ \ \
 \\/  ___)| |_)| | | | | || (_| |  ) ) ) )
  '  |____| .__|_| |_|_| |_\__, | / / / /
 =========|_|==============|___/=/_/_/_/
 :: Spring Boot ::                (v2.7.4)

... : Tomcat initialized with port(s): 8080 (http)
... : Starting service [Tomcat]
... : Starting Servlet engine: [Apache Tomcat/9.0.65]
... : Tomcat started on port(s): 8080 (http) with context path ''
... : Completed initialization in 1 ms
测试:
- http://localhost:8080/sayHello
- http://localhost:8080/sayBye
# 5. 数组
定义:
1. 类型[] 变量名 = new 类型[长度]

2. 类型[] 变量名 = new 类型[]{ 元素1, 元素2, ... }

3. 类型[] 变量名 = { 元素1, 元素2, ... }
示例:
int[] nums = new int[3];
nums[0] = 1;
nums[1] = 10;
nums[2] = 100;
System.out.println(Arrays.toString(nums)); // [1, 10, 100]

double[] prices = new double[]{1.0, 2.0, 3.0};
System.out.println(Arrays.toString(prices));

String[] statements = { "123", "abc", "xyz" };
System.out.println(Arrays.toString(statements) + '\t' + statements.length);
数组长度:
arr.length, 获取数组arr的长度- 数组长度一旦定义,就不能更改
数组越界:
int[] arr = {0};
System.out.println(arr[-1]); // ArrayIndexOutOfBoundsException
遍历数组:
for (int i = 0; i < nums.length; i++) {
    System.out.println(nums[i]);
}

// enhanced 'for'
for (int num: nums) {
    System.out.println(num);
}
默认值:
new String[3];  // [null, null, null]
new int[3];     // [0, 0, 0]
new double[3];  // [0.0, 0.0, 0.0]
new boolean[3]; // [false, false, false]
上一篇: 下一篇:
本章目录